
Getting a new roof isn't just about slapping some shingles on top of the old ones and calling it a day. There's a whole process that involves tearing down the old materials, upgrading to meet current building codes, and following strict installation and inspection procedures. Whether you're a homeowner trying to understand what your contractor should be doing or you're considering a DIY approach (spoiler alert: maybe don't), here's everything you need to know about proper shingled roof installation.
Why Proper Installation Actually Matters
Let's be real: your roof is basically your home's first line of defense against whatever Mother Nature throws at it. In Florida, that means hurricanes, torrential rain, and brutal sun. In Illinois, you're dealing with heavy snow loads, ice dams, and severe storms. A properly installed roof can mean the difference between minor repairs and major disaster.
Plus, if you're planning to sell your home or file an insurance claim, having a roof that was installed correctly and up to code can save you thousands of headaches (and dollars) down the road.
The Tear Down Process: Starting Fresh
Before any new shingles go on, everything old has to come off. This isn't just about removing shingles: it's about getting down to the bare deck and assessing what you're working with.
Complete Material Removal
Start by removing all old shingles, underlayment, flashing, and any other roofing materials. Don't try to roof over existing shingles: it might seem like a shortcut, but it's a recipe for problems. The extra weight can stress your roof structure, and you won't be able to properly inspect the deck underneath.
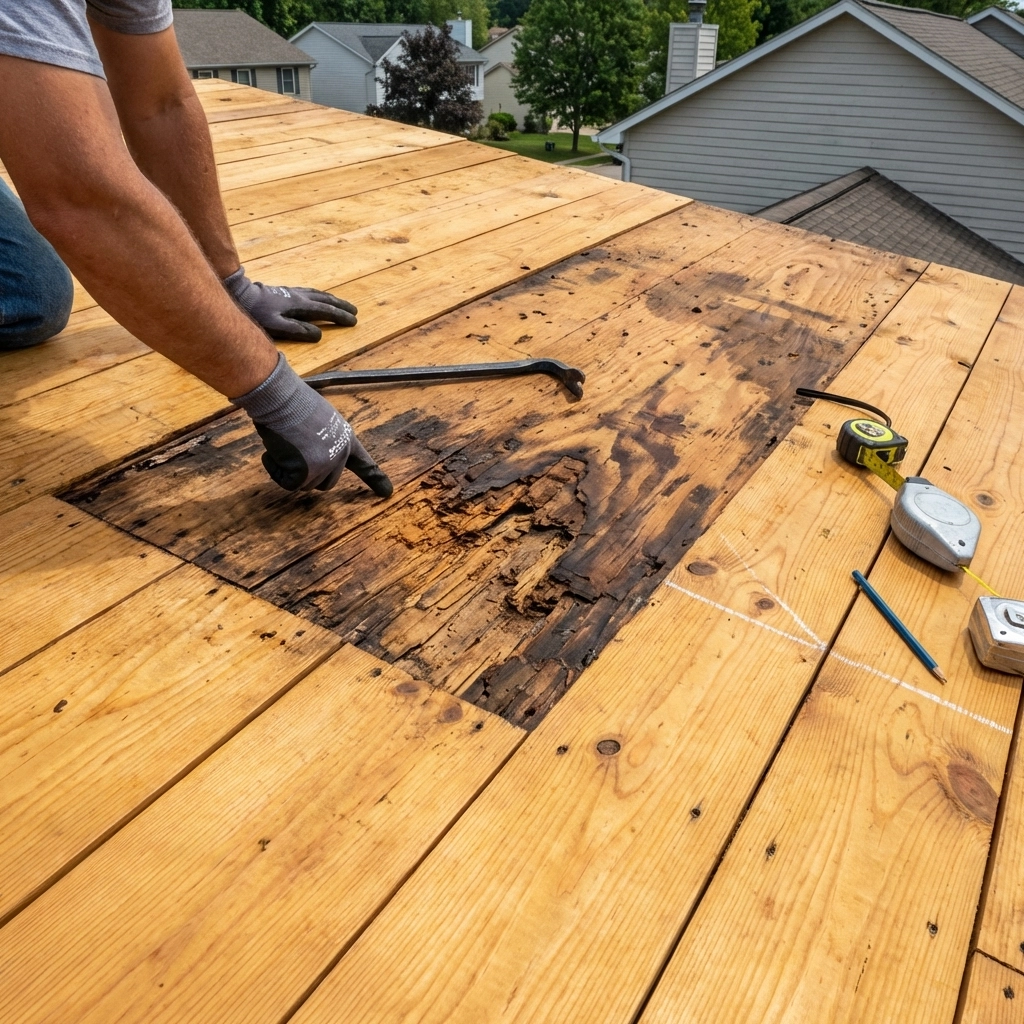
Deck Inspection and Repair
Once everything's stripped off, inspect every square inch of the roof deck. Look for:
- Rotten or damaged plywood or OSB boards
- Sagging areas that might indicate structural issues
- Loose fasteners or gaps between boards
- Any signs of previous water damage
Replace any damaged decking before moving forward. This is your foundation: if it's not solid, nothing else matters.
Debris Cleanup
Sweep the entire roof surface clean. Even small debris can create bumps or gaps that compromise your new installation.
Code Upgrades: What's Changed in 2025-2026
Building codes aren't static: they evolve based on new technology, weather patterns, and lessons learned from past disasters. If your roof is more than a few years old, you'll likely need several upgrades to meet current standards.
Florida-Specific Code Requirements
Florida has some of the strictest roofing codes in the country, and for good reason. Recent updates include:
- Enhanced wind resistance requirements: New installations must use shingles rated for higher wind speeds (typically 130+ mph in many areas)
- Improved fastener specifications: More nails per shingle and specific placement requirements
- Secondary water barrier requirements: Ice and water shield must extend further up the roof in vulnerable areas
- Upgraded flashing standards: Metal flashing requirements have become more stringent around penetrations
Illinois Code Updates
Illinois faces different challenges, mainly related to snow loads and ice damming:
- Enhanced ice dam protection: Extended ice and water shield requirements, especially in northern counties
- Improved ventilation standards: Better intake and exhaust ventilation requirements to prevent ice dam formation
- Snow load considerations: Specific requirements for roof structures in areas with heavy snow loads
- Energy efficiency requirements: New insulation and ventilation standards that tie into roofing installation
Universal Code Upgrades
Regardless of location, most areas now require:
- Synthetic underlayment in high-risk areas
- Improved attic ventilation systems
- Enhanced fire resistance ratings
- Better penetration sealing methods
Proper Installation Step-by-Step
Now for the main event: actually installing your new roof. This process has to be done in a specific order, and cutting corners at any step can compromise the entire system.
Drip Edge Installation
Install drip edge along all eaves before laying any underlayment. This metal flashing directs water into gutters and protects the roof edges. Position it to overhang the edge by about 1/2 inch and secure with roofing nails every 12 inches.
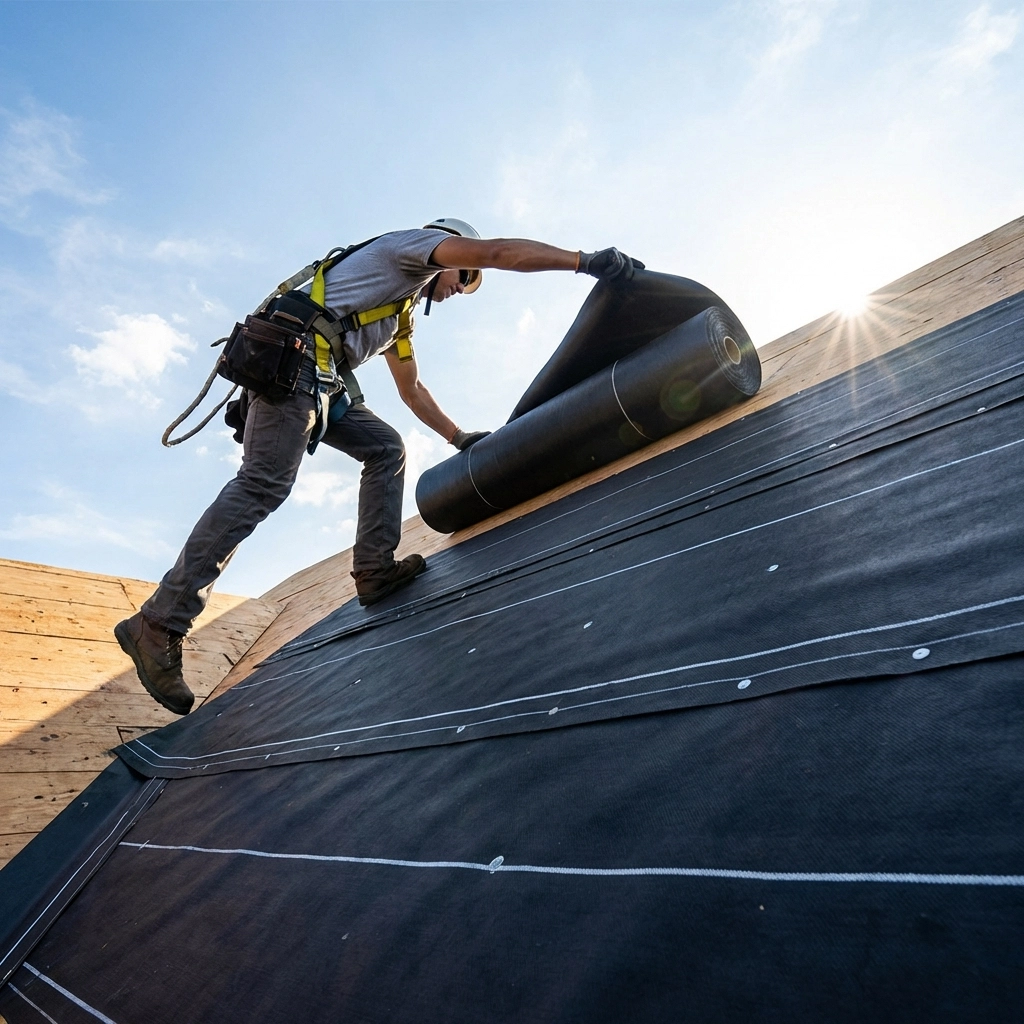
Underlayment Application
Start at the bottom edge and work your way up:
- Roll out underlayment horizontally across the roof
- Overlap each row by 6 inches minimum
- Secure with cap nails every 12 inches along edges and 24 inches in the field
- In vulnerable areas (valleys, around penetrations), use self-adhering membrane for extra protection
Starter Strip Installation
Cut regular shingles in half and install them along the bottom edge with the adhesive strip facing up. This gives your first course of shingles something to seal against and prevents wind uplift at the eaves.
Shingle Installation Pattern
Here's where technique really matters:
- First course: Install full shingles directly over the starter strip, aligning with chalk lines for straightness
- Create the offset pattern: For the second row, cut 6 inches off the first shingle. Third row, cut 12 inches off. Continue this pattern to ensure seams don't line up
- Nail placement: Four nails per shingle, positioned about 1 inch from the sides and 1 inch above the cutout tabs
- Work systematically: Install one complete course before starting the next, checking alignment frequently
Ridge Cap Installation
Use pre-manufactured ridge cap shingles or cut regular shingles to create caps. Install them along the peak with proper overlap, ensuring nails from each piece are covered by the next overlapping piece.
Handling Penetrations
Pipes, vents, and other roof penetrations require special attention:
- Install flashing boots that fit snugly around pipes
- Use appropriate flashing materials for different penetration types
- Seal all connections with high-quality roofing cement
- Cut shingles carefully to maintain proper water flow
Inspection Requirements and Process
A proper installation isn't complete without thorough inspection: both during the process and after completion.
During Installation Inspections
Most jurisdictions require inspections at key points:
- After tear-off and deck repair
- After underlayment installation
- After completion but before final approval
What Inspectors Look For
- Proper fastener placement and quantity
- Correct overlap patterns and seam staggering
- Adequate flashing around penetrations
- Proper ventilation installation
- Code compliance for wind resistance and water protection

Self-Inspection Checklist
Even if you're having professional work done, you should know what to look for:
- No exposed nails or fasteners
- Straight, properly aligned courses
- Adequate shingle overhangs at eaves and rakes
- Proper sealing around all penetrations
- Clean valleys with appropriate flashing
- Ridge caps properly overlapped and secured
When DIY Makes Sense (Spoiler: Rarely)
Look, we get it: roofing can seem straightforward, and there are plenty of YouTube videos that make it look easy. But here's the reality: proper roof installation requires specialized knowledge, tools, and experience.
Code compliance alone is a full-time job. Building inspectors don't mess around, and a failed inspection can mean tearing off work that wasn't done correctly. Factor in safety concerns (roofing is one of the most dangerous construction jobs), warranty issues, and the sheer physical demands, and professional installation starts looking pretty smart.
Red Flags to Watch For
Whether you're doing the work yourself or hiring someone else, watch out for these shortcuts that can cause big problems:
- Roofing over existing shingles
- Inadequate fastener quantity or placement
- Skipping the underlayment or using substandard materials
- Improper flashing installation
- Not following manufacturer specifications for overlap and alignment
Making Sure It's Done Right
The bottom line is that your roof is too important to get wrong. Between Florida's hurricane seasons and Illinois's brutal winters, you need an installation that's going to protect your home for decades to come.
If you're in Florida or Illinois and dealing with roofing decisions, remember that proper installation isn't just about following steps: it's about understanding how your local climate affects your roof and making sure every detail meets or exceeds current building codes. The upfront investment in doing it right will save you money, stress, and potential disaster down the road.
Whether you're planning a roof replacement or just want to understand what your contractor should be doing, knowing these fundamentals puts you in control of one of your home's most important systems.